Nano Banana Pro Tutorial - Turn NotebookLM into Whiteboard Animation
Turning your research into visual content is now much easier. With NotebookLM to whiteboard with Nano Banana, you can change simple notes into clear, engaging whiteboard-style animations. This method helps explain ideas in a way that feels natural and easy to follow. Whether you are a student, teacher, or content creator, this approach saves time and improves understanding.
Instead of long text documents, you get visual storytelling that holds attention. This guide shows you how to connect NotebookLM with Nano Banana and turn your notes into step-by-step whiteboard animation videos.
Part 1. Overview of NotebookLM and Nano Banana
What Is NotebookLM
NotebookLM is an AI-powered research and note-understanding tool by Google designed to help you extract meaning from your content without manual effort. It goes beyond simple storage it reads and explains your material so you can focus on insights. NotebookLM works with a variety of formats, including:
- Notes
- PDFs
- Research papers
- Business documents
Instead of requiring you to organize or design content manually, NotebookLM understands and explains what your text means, making it easier to turn research into usable output like summaries or visual stories.
What Is Nano Banana
Nano Banana is Google's AI visual generation model that's integrated into NotebookLM to bring your ideas to life visually. While NotebookLM focuses on understanding text, Nano Banana works quietly in the background to:
- Generate illustrations that match your content
- Apply visual styles to make them look engaging
- Support animated video outputs for richer storytelling
In whiteboard animations, Nano Banana is the engine that takes structured explanations from NotebookLM and turns them into visuals and motion you can watch and share.
What Is Whiteboard Animation in NotebookLM
In this context, whiteboard animation isn't a static board you draw on manually it's an AI-generated video that looks like hand-drawn sketches combined with narration. Using the process of NotebookLM to whiteboard with Nano Banana, your written notes become animated stories that are easy to follow. Key features include:
- Hand-drawn, whiteboard-style illustrations that visually explain ideas
- AI-generated narration synced with visuals to guide viewers through the concept
- Step-by-step visual storytelling that breaks down complex topics
Typical use cases include:
- Teaching and education, where clear visuals help explain subjects
- Explaining complex research or ideas in a digestible format
- Business presentations and summaries that benefit from engaging animation
In this workflow, NotebookLM provides the structured explanation from your notes and documents, and Nano Banana handles the visual and animation generation together turning NotebookLM notes into whiteboard animation you can use for learning or communicating ideas.
Part 2. How to Turn NotebookLM Notes into Whiteboard Animation with Nano Banana
Turning your study notes or research into a visual story is now much easier. With the NotebookLM to whiteboard with Nano Banana free method, you can change plain text into engaging whiteboard-style animation videos. NotebookLM helps organize and explain your content, while Nano Banana creates the visuals. Then, a whiteboard animation tool brings everything to life with drawing-style motion.
Step 1: Prepare and Structure Your Content in NotebookLM
-
Create a New Notebook:
-
Upload Your Documents:
-
Write a Clear Script:
-
Change to Pitch Deck or Overview:
-
Let NotebookLM Generate Notes:
Log into NotebookLM and start a new notebook where you will work on your animation content.

Add all documents you want to turn into animation this can include notes, PDFs, research texts, or business content.

Go through your documents and write a simple, clear script describing what each part of your video should explain. Break it into short scenes or points.

In NotebookLM Studio mode, switch the output to Pitch Deck if available. This helps NotebookLM organize your content into a scene-by-scene format.

Wait while NotebookLM processes your text and outputs structured scene content this becomes the backbone of your whiteboard animation.
Step 2: Use Nano Banana to Create Scene Visuals
-
Go to Nano Banana:
-
Generate Images for Each Scene:
- "Hand-drawn icon of research process with arrows."
- "Whiteboard style infographic showing steps 1 to 5."
-
Nano Banana Creates Images:
-
Download the Visuals:
Open Nano Banana, the AI image generation model that works with NotebookLM to produce visuals.

For every scene in your NotebookLM script, write a short prompt describing what you want to see. Example prompts:

Click Generate Image. Nano Banana will produce illustrated scenes, infographics, or sketches that match your prompts.
Save these images, they are the visuals you will use in your animation tool.

Step 3: Convert Images into Whiteboard Animation
-
Choose a Whiteboard Animation Tool:
-
Upload Your Scene Images:
-
Customize Pen and Drawing Style:
- Set the sketch duration (how fast each image is drawn).
- Arrange the scene order if needed.
-
Generate the Animation:
Use a free or trial animation tool like Speedpaint or similar apps that convert images into sketch animations.

Import each visual you got from Nano Banana into the animation tool in the correct sequence.

Select a pen style (e.g., pencil, marker) that will be used in the animation.

Click Generate the tool will start converting still images into an animated whiteboard video where each image is drawn step by step.
Step 4: Add Narration and Final Edits (Optional but Recommended)
- Record Your Voice:
Use your phone or a free voice recorder to read your script. Keep it clear and paced to match your animation.
- Or Use AI Voice Tools:
If you prefer, use a free AI voice generator to create narration from your script text.
- Sync Audio with Video:
Open a free video editor (like CapCut or OpenShot), upload your animation video and audio file, and align them so narration matches visuals.
- Preview and Export:
Watch the video once more to ensure everything flows, then export your final whiteboard animation as an MP4 file.
Part 3: Tips to Improve NotebookLM Whiteboard Animation Quality
To make your animations look professional and engaging, it's not just about AI tools how you prepare and structure your content matters. Follow these tips to turn NotebookLM notes into whiteboard animation.
Write Your Script with Presentation Flow in Mind
- Use short and clear statements for easy reading.
- Highlight keywords or important phrases to emphasize them in visuals.
- Avoid overly complex sentences that may confuse the animation or viewers.
- Think of your script as a storyboard, guiding the viewer through each scene naturally.
Use NotebookLM Sections as Scenes
When organizing notes in NotebookLM, treat each heading or section as a separate scene in your animation. This makes the content easier for Nano Banana to interpret visually. Each section becomes one visual moment, helping the animation flow naturally from one idea to the next. This structure is key when you want to turn documents into beautiful videos with Nano Banana in NotebookLM.
Combine Explainer + Brief Output for Best Results
- For long content, start with a brief summary version to provide a quick overview.
- Then create a full explainer version for detailed explanation.
- You can stitch both videos together later for a complete, engaging whiteboard animation.
- This approach keeps your video concise, structured, and viewer-friendly.
Clear scripts and well-organized sections make it much easier to turn documents into beautiful videos with Nano Banana in NotebookLM. Small adjustments in structure and wording can significantly improve the animation quality.
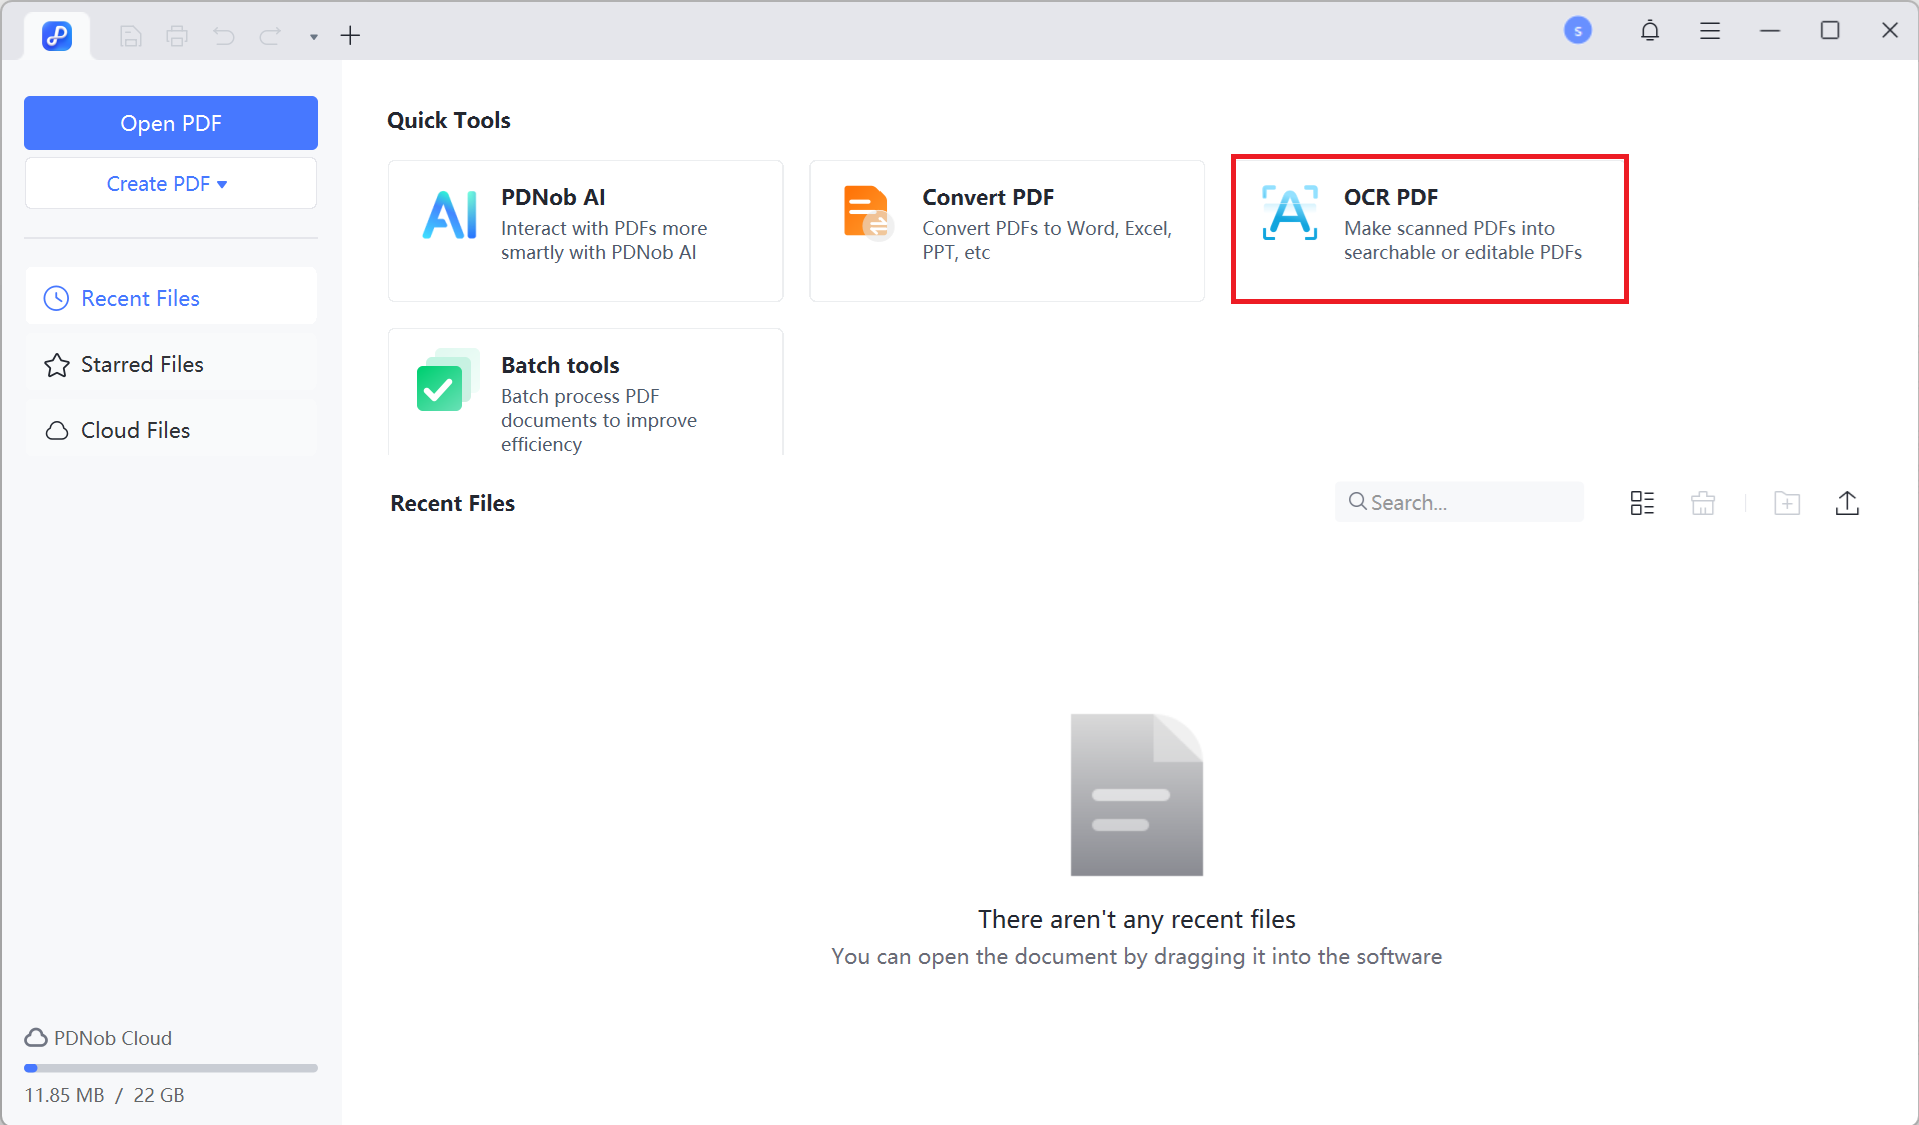
Part 4: How to Edit & Convert NotebookLM PDFs to PPT -- Accurate OCR
NotebookLM makes it easy to generate PDFs or slide decks from your notes and research. However, these PDFs aren't always easy to edit, and converting them to PowerPoint can cause layout, formatting, or text alignment issues.
This is where a tool like PDNob becomes invaluable. Rather than just converting files, PDNob is designed to accurately recognize AI-generated text, preserve slide layouts, and maintain formatting, ensuring that your converted PPT retains the structure and clarity of the original NotebookLM PDF. It also allows you to edit text, add annotations, and adjust visuals before or after conversion, giving you full control over your slides.


Why Choose PDNob PDF Editor
- Accurate OCR -- Recognizes AI-generated and multi-language text, keeping slides fully editable.
- Preserve Layout -- Maintains original structure and formatting, saving time on adjustments.
- Full Editing & Annotation -- Edit text and add comments before or after conversion.
- Flexible Conversion -- Convert PDFs to PPT or other formats for easy reuse.
- Clean Output -- Handles text, images, and diagrams for presentation-ready slides.
Steps to Edit & Convert NotebookLM PDFs to PPT with PDNob
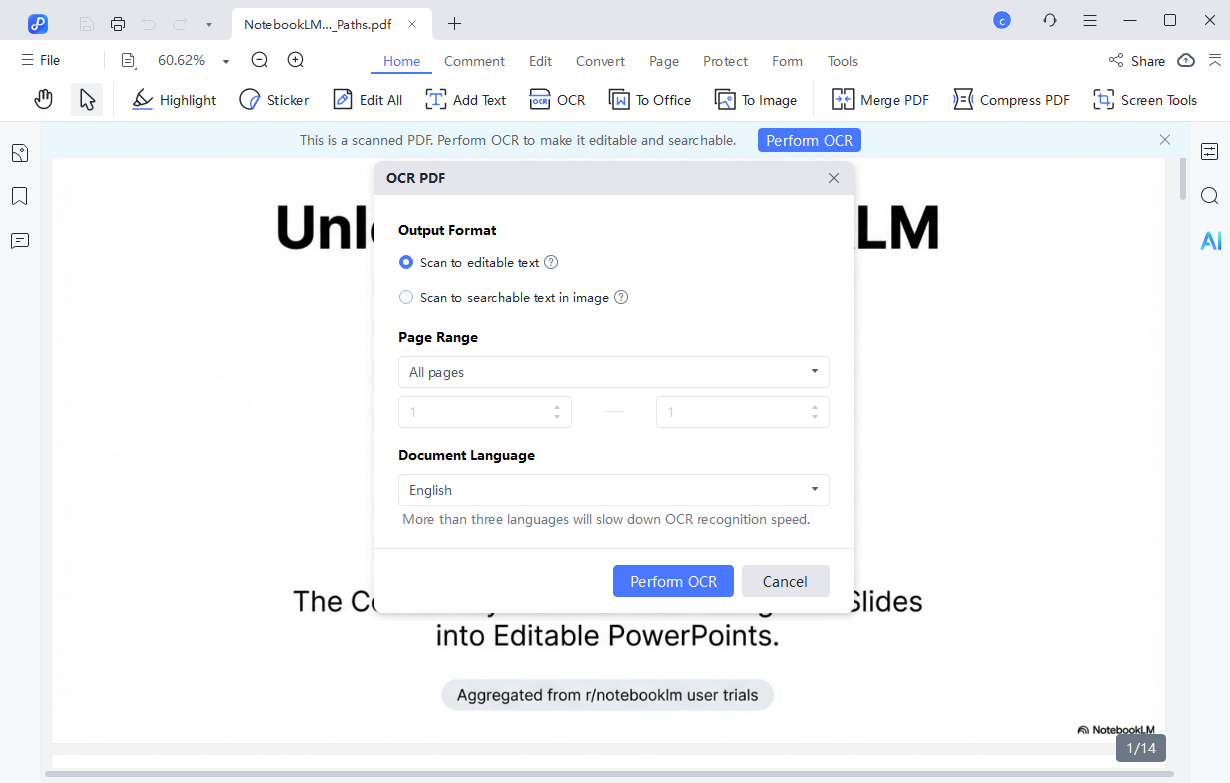
- Step 1: Launch PDNob PDF Editor on your computer. Go to the OCR PDF option and select the NotebookLM PDF you want to edit.
- Step 2: If required, install the OCR module. Then choose “Scan to Editable Text” mode. PDNob will identify all text, separate headings, body content, and background elements—making each slide ready for direct editing.
- Step 3: Once OCR is done, the slides are fully editable. You can correct spelling mistakes, move or resize text boxes, adjust charts, or change headings.
- Step 4: After editing, click Convert to save the slides in the format you need—PowerPoint, PDF, or Word.
In the Document Language dropdown, pick the language of your source file. Choosing the wrong language may reduce OCR accuracy.


Part 5: FAQs About NotebookLM Whiteboard Animation
Q1. How do I use Nano Banana in NotebookLM?
A1: Open your NotebookLM notes and go to the Video Overview or Studio section. Use Nano Banana to generate images for each scene by describing what you want illustrated.
Q2. Can Nano Banana do animations?
A2: Nano Banana itself creates images, not full animations. You can then use these images in a whiteboard animation tool like Speedpaint or Canva to make animated videos.
Q3. How do I create whiteboard animation in Canva?
A3: Upload your Nano Banana images to Canva. Use the animation or slide features to create drawing-style motion. Add text, narration, or transitions to complete your whiteboard video.
Q4. How do I create whiteboard animation with AI?
A4: Combine a script from NotebookLM, images from Nano Banana, and a whiteboard animation tool. AI helps generate visuals, text summaries, and optional narration automatically.
Q5. What makes Nano Banana so good?
- It creates hand-drawn style images for whiteboard videos.
- Works well with AI-generated content from NotebookLM.
- Supports quick and clear visual storytelling, perfect for teaching, presentations, and explaining complex ideas.
Conclusion
With NotebookLM to whiteboard with Nano Banana, NotebookLM notes become engaging, hand-drawn whiteboard animations that explain ideas clearly and visually.
For PDFs or slide decks, PDNob PDF Editor ensures content is fully editable, preserves layouts, and converts slides seamlessly. Using these tools together lets you bring documents to life, producing professional and visually appealing videos with ease.


- Make scanned PDFs searchable and editable with 99% OCR precision
- Batch convert PDFs to Word, Excel, PPT, images, PDF/A, Text, EPUB, etc., up to 30% faster
- Edit PDFs easily like Word, including text, images, watermarks, links, and backgrounds
- Annotate PDF with highlights, comments, shapes, stickers, and stamps
- Run smoothly on any PC without lags or crashes, even on low-spec machines
![]() Secure Download
Secure Download
![]() Secure Download
Secure Download
Speak Your Mind
then write your review
Speak Your Mind
Leave a Comment
Create your review for PDNob articles
