TIFF, which stands for Tag Image File Format, is a larger file format that contains a lot of details in an image than its JPG counterpart. Since TIFF stores more visual info, it is often, for example, preferred by most photographers because of its amazing image quality and resolution.
However, because of its large size, TIFF isn’t friendly with most websites and even some social media platforms. For example, if you try to upload a TIFF file to a website, a window may pop up with a message that you’ve exceeded the maximum file size required.
In addition, TIFFs aren’t compatible with some social media platforms like Instagram. So, to solve this problem, you might consider converting TIFFs to smaller file sizes before you can share them online.
Basically, it is much easier to upload JPGs to websites because of their smaller file size. Besides, JPGs are web-friendly and can be easily shared across many platforms.
This is why in this article, we’ve put some case methods you can use to convert TIFF to JPG Windows 10 and Mac while keeping most of the image quality.
Feel free to jump to any section to convert your TIFF to JPG. Otherwise, let’s get started.
Case 1: Convert tiff to jpg windows 10 using Paint
MS Paint is a basic image editing software that comes pre-installed with Windows 10. You can quickly convert TIFF to JPG using MS paint by simply saving a TIFF image file as JPG. Let’s see how.
- STEP1: Right-click on your TIFF image file, Open With and click on the Paint option in the menu.
- STEP2: Go to the File menu. And select Save as and choose the JPEG Picture option from the File menu.
- STEP3: Choose the desired location on your computer, enter the file name, and click the Save button to save the file as a JPEG image.
Choose the default program if the Paint option doesn’t appear in the context menu. Choose Paint from the new window that pops up.
Case 2: How to convert TIFF to JPG on Mac using Preview
Preview App comes freely on Mac computers. With Preview, you can easily convert multiple TIFF file types to JPG as opposed to other TIF to JPEG converter applications.
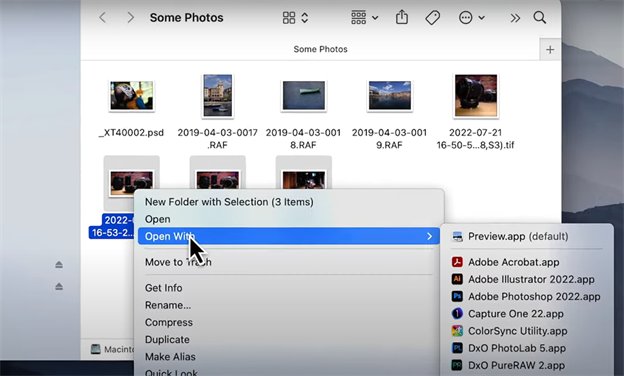
- STEP1: Open your folder with TIFF images. And select the images you want to convert. Right-click the images and select Open With > Preview app.
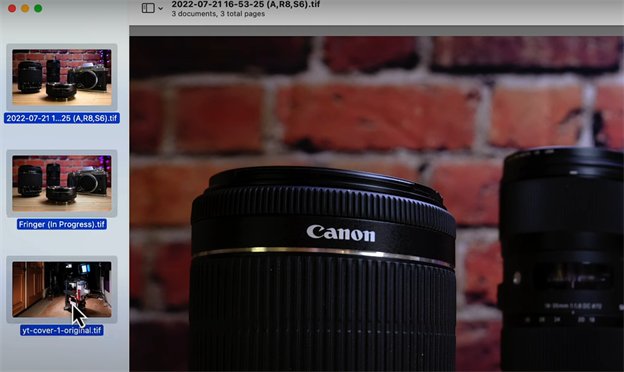
- STEP2: Click the first image on the left side and then hold down the Shift key and click the last image to select them all.
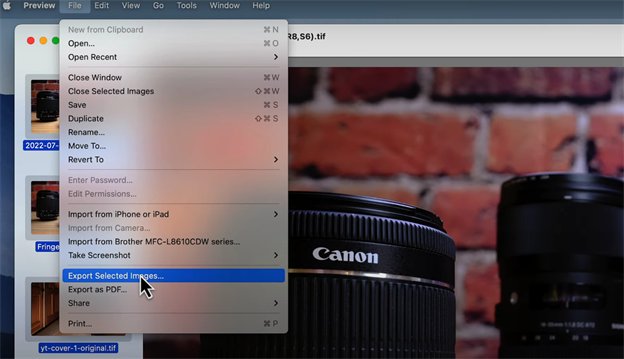
- STEP3: Go to File and select Export selected images options to export selected images
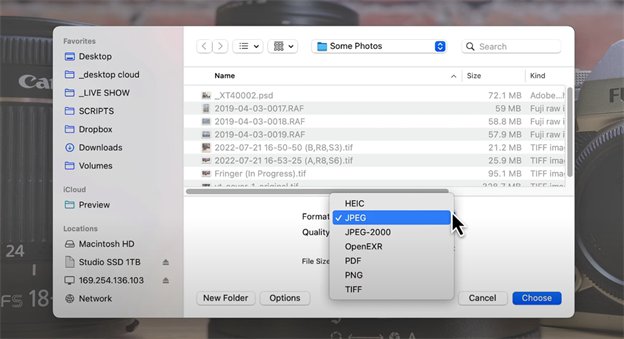
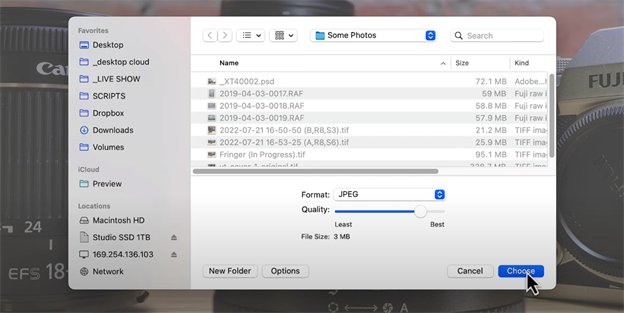
- STEP4: Next, click Options and select the JPEG.
- STEP5: You can keep the image quality as the default. However, if you don’t mind losing some of the image quality, you can adjust the Quality toggle line to get a smaller file size and lose a bit of quality. For this guide, we’ll maintain it at the default for the best quality and click Choose.
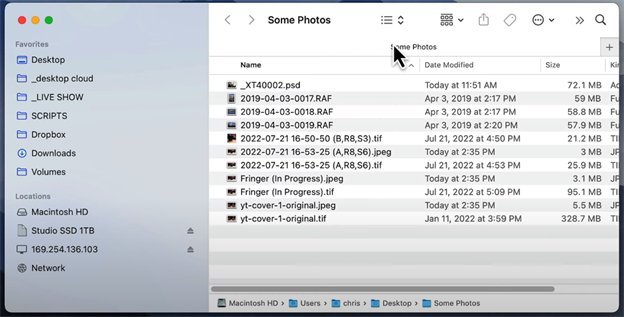
That’s it. You will see your images that looks something like this on your TIFF folder. You can choose to sort the files by type.
Case 3: Convert TIF to JPG using Photoshop
Adobe Photoshop is also another popular image editing program that you can use to convert multiple TIFF to JPG. However, unlike Preview, Adobe Photoshop isn’t free.
Although there are free alternatives to Photoshop, you won’t have access to all the features Photoshop has to offer. So, let’s get started batch converting TIFF to JPG in Adobe Photoshop.
- STEP1: Start Adobe Photoshop and go to File > Scripts > Image Processor to select a folder with all the TIFF image files that you want to convert.
- STEP2: Click Select Folder in Image Processor to open your TIFF folder and then select the location you want it saved.
- STEP3: Check the box next to Save as JPEG and click the Run button at the top-right corner to start converting multiple files to JPEG with Adobe Photoshop.
After this, you may want to optimize them for the web by using an image compression tool like TinyPG or JPEGmini to further reduce the file size without losing the quality.
To avoid all this trouble, you can opt to convert one file at a time and optimize each file for the web and other devices. Simply follow these steps to make your TIFF files smaller:
- 1.Right-click on a TIFF file and Open With Adobe Photoshop.
- 2.Go to Files > Save for Web & Devices. This may take a while to load depending on the TIFF file size.
- 3.Select JPEG from the dialog menu box at the top right-hand section and hit Save.
- 4.Enter your file name in the Save As and select the location you want it to save it in then hit Save again.
Case 4: TIF to JPG without losing quality
So far, we’ve been talking about software tools you can use to quickly convert your TIFF to JPG. However, there is an easy way you can convert to TIFF by manually renaming all your TIFF file names and saving them without losing quality.
The only downside with this case method is that it can be limiting if you want to convert multiple files at once.
Follow these simple steps and convert your TIFF file to JPG:
- STEP1: Right-click on the TIFF file and choose the Rename option.
- STEP2: Replace the .tiff with .jpg as your file extension name and press Enter.
- STEP3: Choose Use .jpg button from the pop up window that appears to finish the conversion.
That’s it. You’re done. It is important to note, however, that not all computer has this conversion feature. So, if it doesn’t work on your device, try out the first three cases to convert your files.
Wrap Up
As you can see, there are several TIF to JPEG converters to change your TIFF files to JPG. While Microsoft Paint and Preview are choices to convert TIFF to JPG windows 10, Adobe Photoshop and Preview in OS X 10.6.5 or later versions will give you more flexibility in terms of file quality versus file size. If you need to save even more space, feel free to optimize the JPEG image size (see Case 3 step 3 for image compression).